Installation
The system is split into 7 substacks, each with its own docker-compose.yml file. In the Services section, they were highlighted in the main sketch.
We will configure the system in the following order:
flowchart LR
  Download --> Traefik --> s[KC Setup] --> KC --> Kaldi --> PnC --> Monitoring --> Backend --> Frontend
At the root of the repository, you will find an env.sh helper file. This script will set up appropriate environment variables for Docker Compose for each of the steps listed above. By running source env.sh you can see which of the substacks are enabled and which are disabled. When finished with the installation, source env.sh should output:
|
|
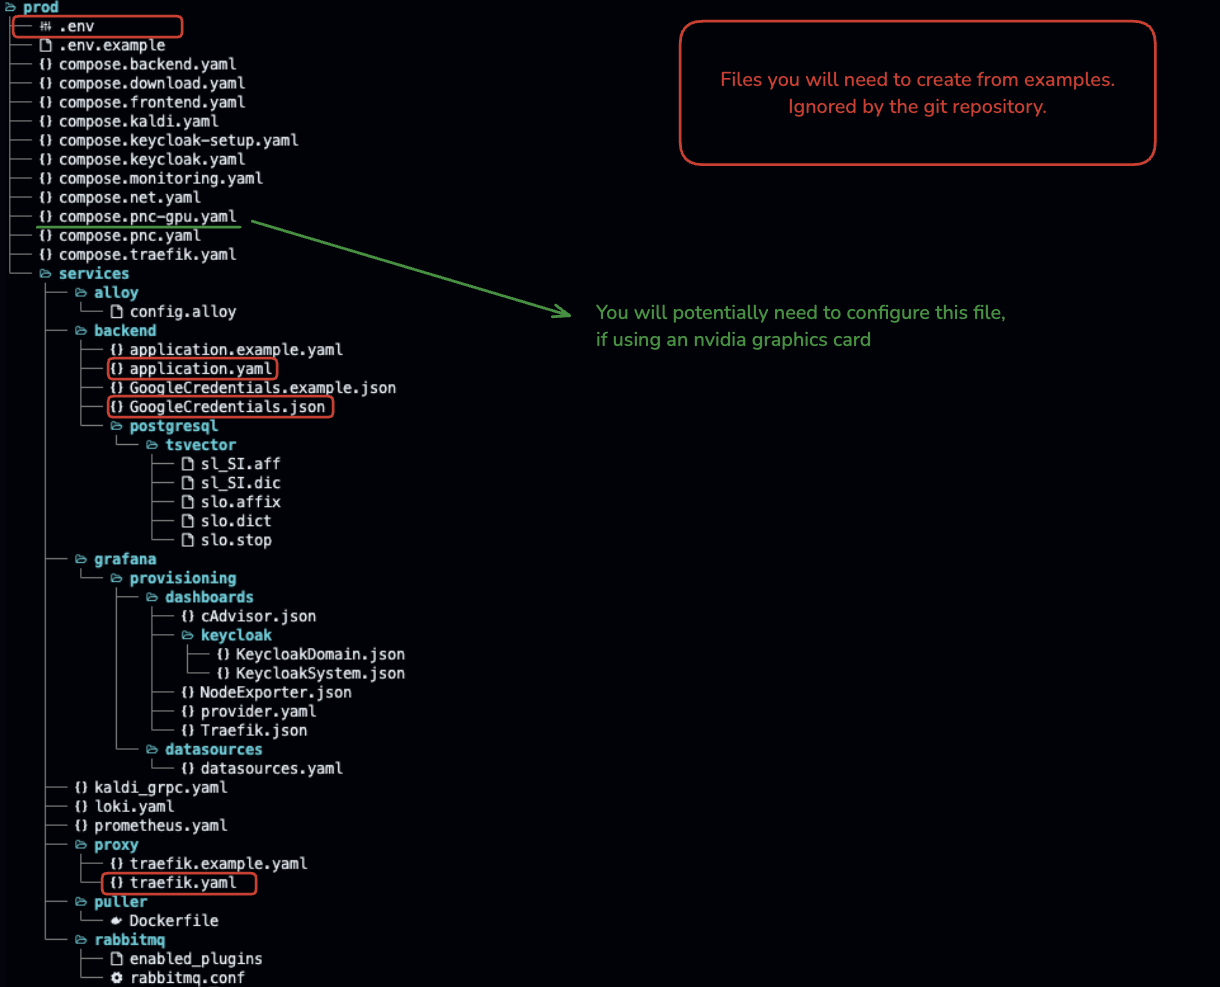
All of the configuration and deployment files are located in the /prod directory.
Step 0
Copy ./prod/.env.example to ./prod/.env and fill in the required values. The DNS fields should contain no protocol, just the domain name.
E.g.:
|
|
Also, don’t forget to set MINIO_ACCESS_KEY and MINIO_SECRET_KEY. You are free to change all usernames and passwords to fit your requirements.
Downloading the Models
Run source env.sh download and then follow up with docker compose up. Wait until all the containers finish. Note that this step will fail if you haven’t properly configured the MINIO_HOST, MINIO_ACCESS_KEY, and MINIO_SECRET_KEY in the ./prod/.env file.
The downloaded models reside in the ./data/kaldi and ./data/pnc directories respectively.
After the download it is also advised to run sudo chown -R YOUR_USERNAME data to change the ownership of the downloaded files, since they retain their original ownership set by the remote storage.
Setting up the Reverse Proxy
Copy the configuration file with cp prod/services/proxy/traefik.example.yaml prod/services/proxy/traefik.yaml. In the traefik.yaml file, set the certificatesResolvers.maincertresolver.acme.email to your email address.
Afterwards, run source env.sh traefik and then docker compose up -d. This will set up the reverse proxy.
Run docker compose logs to check if everything is running correctly. The logs should be mostly empty. Visit the
https://Managment DNS/dashboard/ (dont forget the trailing slash) to verify that the Traefik dashboard is running. Enter appropriate credentials from the .env file (TRAEFIK_DASHBOARD_CREDS).
Setting up the Authentication Service Keycloak
Run source env.sh setup and then docker compose up. In a secondary terminal, change the directory to terraform and create a new terraform.tfvars file with the following content:
|
|
Check the terraform/variables.tf file for more information on the variables and their descriptions.
If you are unfamiliar with Terraform, you can find more information on the official website.
Instead of installing Terraform on your machine, you can use the Docker image. Run the following commands in the terraform directory:
docker run -it --rm -v $PWD:$PWD -w $PWD hashicorp/terraform:latest initThis will download the required plugins for Terraform. Afterwards, you can run:
docker run -it --rm -v $PWD:$PWD -w $PWD hashicorp/terraform:latest applyAfter being prompted to confirm the changes, answer yes and the setup will be complete.
Verify the Keycloak Setup
To verify the setup, navigate to https://Keycloak DNS and log in with the credentials you set in the terraform.tfvars file. Note that the administrator login is only available when the setup is in progress. After the setup is complete, the administrator login will be disabled.

Switch to the on realm and verify that the developer account was created.

Afterwards, close the terminal with the Terraform setup and interrupt the docker compose up command with Ctrl+C.
Keycloak
All we need to do now is run source env.sh keycloak and then docker compose up -d. This will start the Keycloak service in the background. Verify that the service is running with docker compose logs. Note that the administraor login is now blocked by the reverse proxy for security reasons.
Kaldi Transcription Services
In the .env file, set the following variables:
KALDI_ON_DR_NUM_OF_WORKERS- the number of workers for non-STEM courses.KALDI_ON_NT_NUM_OF_WORKERS- the number of workers for STEM courses.
This will dictate the number of possible concurrent streaming sessions for each type of course. A rule of thumb is to reserve 1.5GB of RAM per worker.
We already set up the Kaldi services in the Download step. Now, we just need to run source env.sh kaldi and then docker compose up -d. Verify that the service is running with docker compose logs.
Punctuation and Capitalization Service
Again, we already set up the PnC service in the Download step. Now, we just need to run source env.sh pnc and then docker compose up -d. Verify that the service is running with docker compose logs. Note that PnC is best deployed with a GPU. The helper script will try to automatically detect the GPU and set the appropriate environment variables. Look at the source code of the env.sh script for more information and the ./prod/compose.pnc-gpu.yaml file for GPU-specific configurations.
Intermediate step
At this point, the output of source env.sh should be:
Substack on-traefik is running.
Substack on-keycloak is running.
Substack on-kaldi is running.
Substack on-pnc is running.
Substack on-monitoring is not running.
Substack on-backend is not running.
Substack on-frontend is not running.
Monitoring
Run source env.sh monitoring and then docker compose up -d. Verify that the service is running with docker compose logs. Note that the first-time run might take a while.
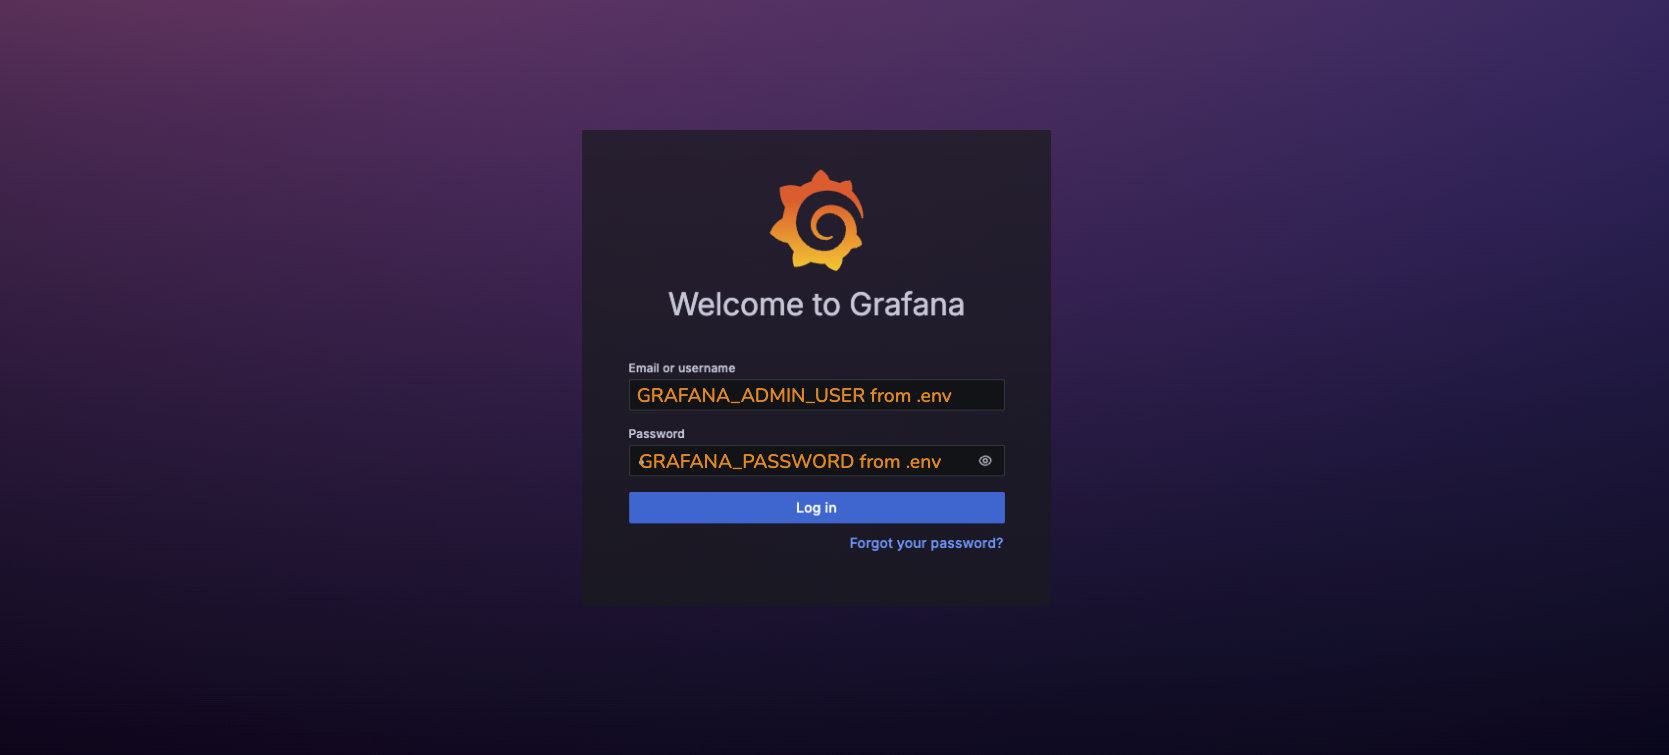
Navigate to https://Management DNS/grafana/login and log in with the credentials from the .env file.
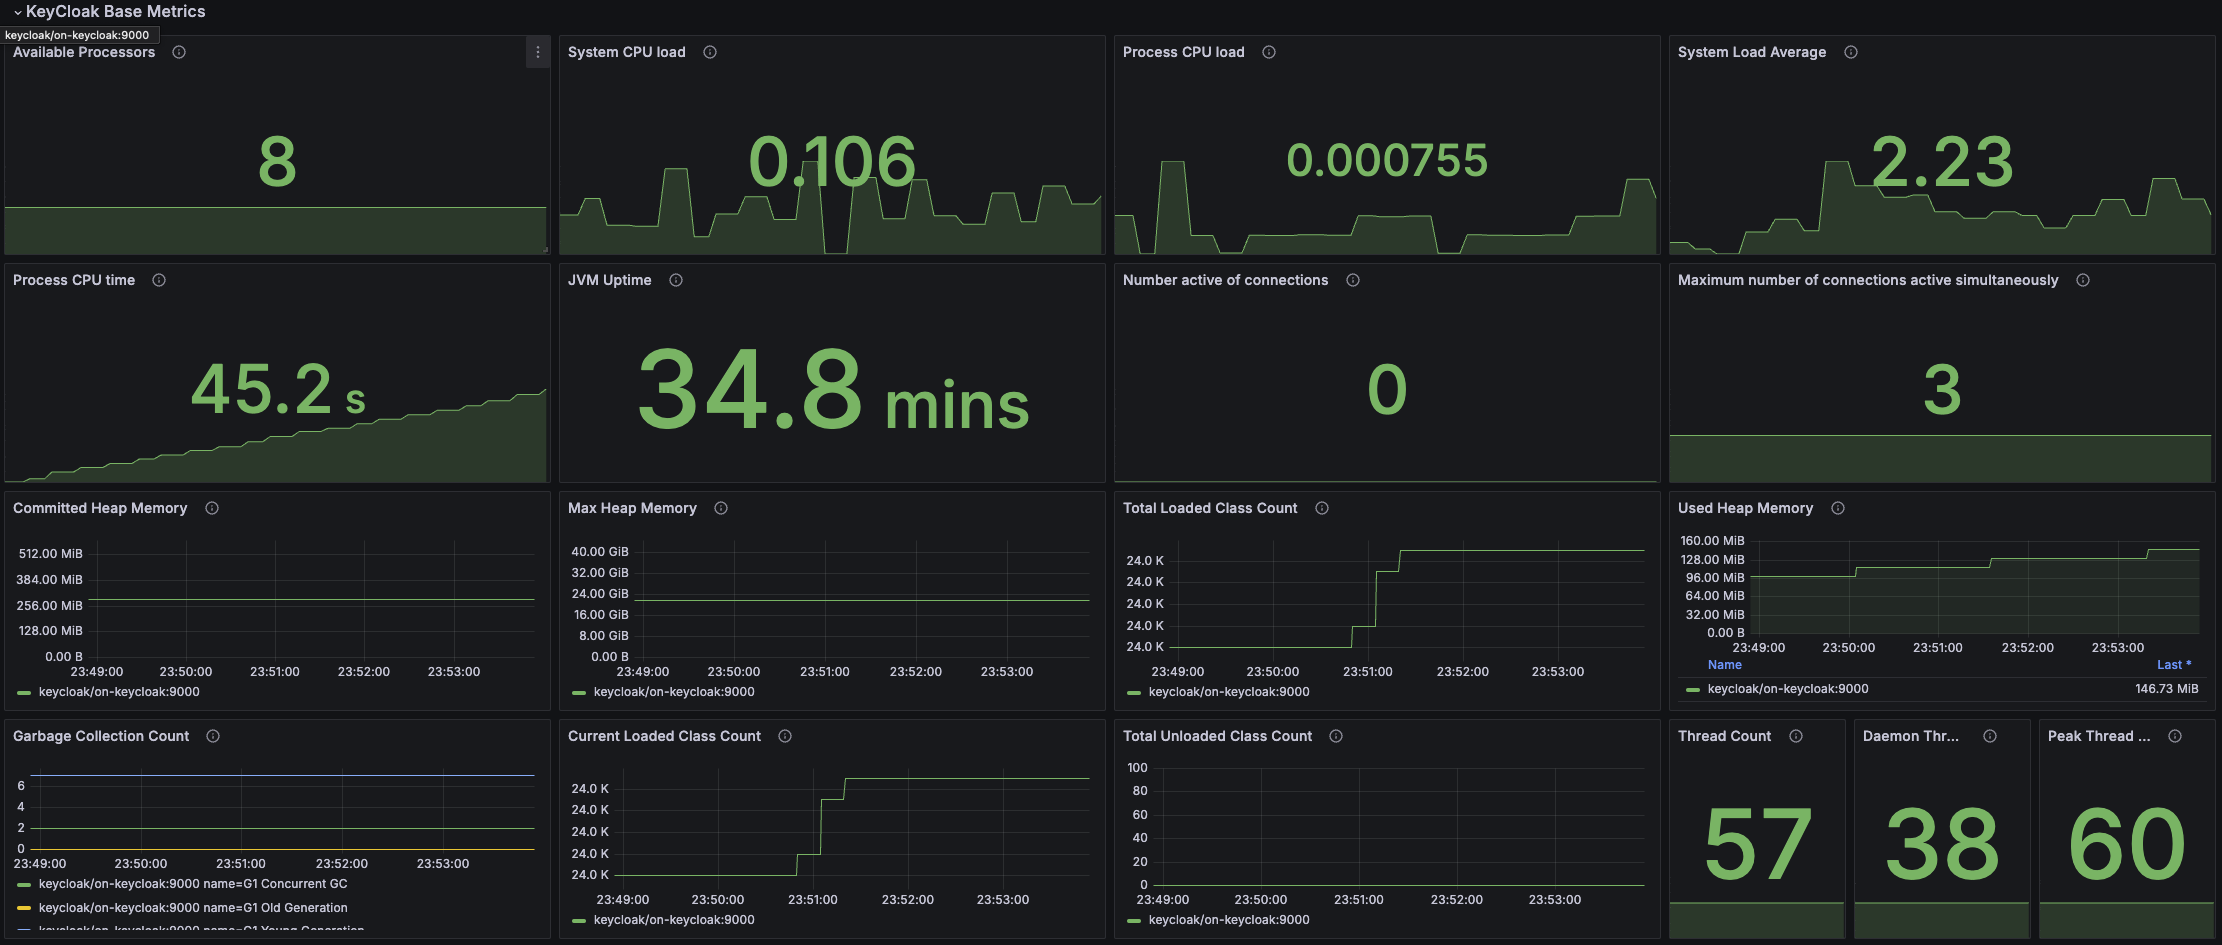
To verify everything is working, click the Dashboard button and the Keycloak system dashboard. It should look something like this:
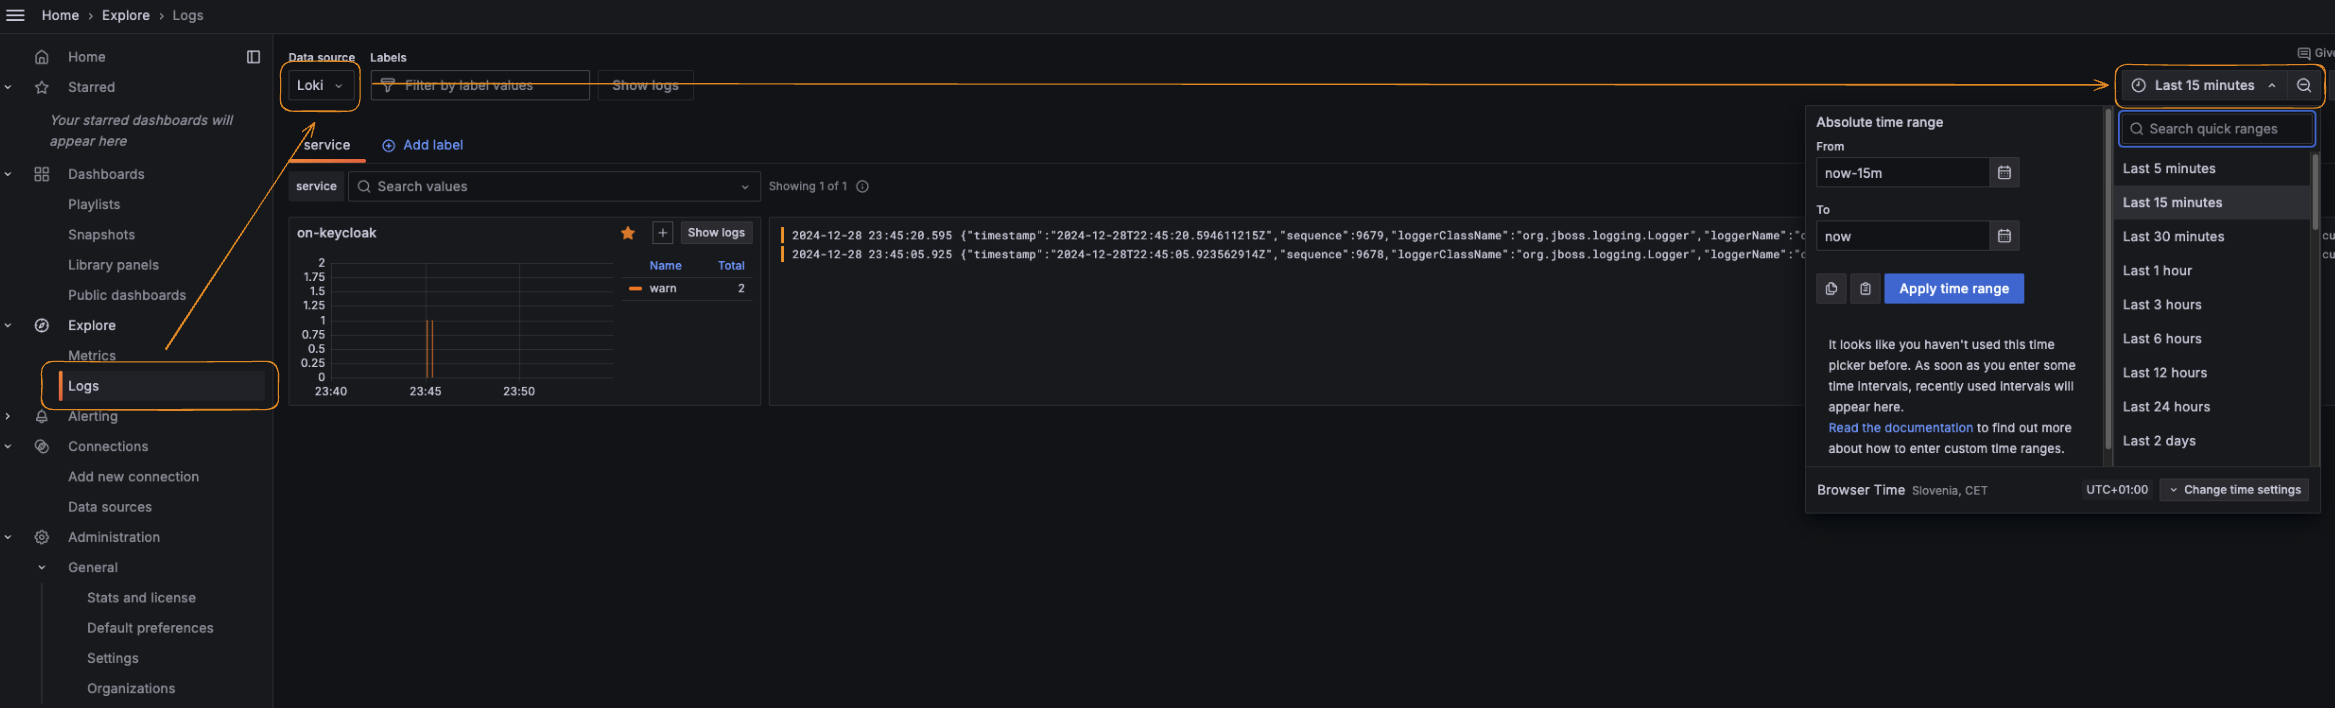
Verify that log collection is working by navigating to the “Logs explore” page and selecting the Loki datasource. You should see logs from the keycloak service.
Backend
In ./prod/services/backend/, copy the application.example.yaml to application.yaml and fill in the required values. In addition, place your GoogleTranslation.json (which you acquired in the prerequisites) in the same directory.
Run source env.sh backend and then docker compose up -d. Verify that the services are running with docker compose logs.
Frontend
Run source env.sh frontend and then docker compose up -d. Verify that the services are running with docker compose logs.
Navigate to https://Main DNS/, https://Main DNS/admin and https://Main DNS/stream to verify that the frontend services are running - all should redirect you to the login page.